Sunday, December 30, 2012

Reducing Recipe Paper Clutter

The new year is here and those resolutions are back. Eat better, get organized, save money...... Every year we hope for the same thing and every January 2nd we are back to where we were December 31st.

I have decided to look at 2013 and set up mini goals for each month. One thing I wanted to focus on was getting my paper clutter under control. I don't like using my smart phone, computer or other electronic device to read my recipes so I have many printed out and stashed away. I also have recipes given to me by friends and family, from magazines or ones I have handwritten as I was testing out ideas. I had these papers stashed in a drawer but I was unable to access them when I wanted to recreate a dish.

I spent one evening and created a few cookbooks to house the pages I have collected over the years. With a few office supplies I was able to make a few personal cookbooks and clear a drawer of a large stack of paperwork.

I purchased:
1) 3 ring binder . Size 1 1/2 inch
3) 3 ring binder. Size 1/2 inch
A pack of page protectors.
A variety of scrapbook papers
A roll of packing tape

Separating the recipes into piles, I soon found the categories I wanted for my books. I found the following categories:  
Main Meals (Pork, Beef, Poultry, Meatless)
Sweet Treats (Cupcakes, Frostings, Cookies, Pies)
Breads and Sides
Breakfasts and Snacks


I took some pretty paper and slipped it in the front, back and side of the binder and created labels on the computer. I then took some packing tape and made some dividing labels for the top of the sections. I placed them on top because they stuck out to far if they were on the side. I used a page protector sheet, put some scrapbook paper in the page and placed a tab on top with the packing tape and a label made on the computer.


Between each section, I slid the recipes I have printed out, wrote out or ripped out of a magazine into page protectors. This will keep them safe from spills but will also allow me to write Weight Watcher point values, change things to make the recipe fit our family better or anything else I need to write on the page.


For recipes I have not filed yet because I am not sure if they will work or I haven't had the time, I place them in the front pocket of the corresponding  book.

Having my own books have made meal times so quick and easy. They are all recipes we enjoy and almost all of the ones I add can be freezer ready. I no longer have to dig through a drawer of papers to find that one recipe Mom said I should try. This was a project that was well worth the 2 hours spent collecting, sorting and decorating the books.


How do you have your recipe collection stored?

Wednesday, December 19, 2012

Christmas Traditions

Traditions have always held special meaning to me. As a child they offered me a sense of normalcy and as an adult they helped me remember the magic that is Christmas. My parents divorced when I was 2, which meant for me I spent Christmas with one parent one year and the other parent the next year. I was very lucky that both my mom and step mom made sure I had the same traditions in each household. The things we did were not anything too difficult but I always looked forward to them. I am now sharing those things with my boys and remembering all the excitement of Christmas all over again.

We start with the sugar cookies the Saturday before Christmas. We deliver them to friends, family and of course leave some for the big man himself. We also leave out some carrot sticks for the reindeer. The next morning the boys will see the bites taken out of the treats and their stockings full of goodies.

In each stocking a few things will always be there. In the toe a large orange is added. This is a very old family tradition that many families do every year. The stories about the orange and the Christmas stocking are traced back to quite a few different origins but I always liked the story that talks about a very rich man who liked to help the poor in what is now known as Turkey. His name was Nicholas and he later became a bishop in the church.

Bishop Nicholas learned of a poor man with three daughters who had no dowries. And, without dowries, they could not marry. Bishop Nicholas took it upon himself to take three bags of gold coins and toss them down the poor man's chimney.....which somehow happened to land in the daughter's stocking that were hanging up to dry in front of the fireplace. The bags of gold turned into balls of gold which now symbolize the oranges. Bishop Nicholas is often shown in pictures wearing a red ceremonial robe and miter, while holding the staff of a bishop as well as holding three gold balls, gold coins, or pieces of fruit. He was later canonized and made a saint. Thus we know him as Saint Nicholas.

Next in our stocking we have a small box of our favorite cereal. It is the one that when shopping with Mom we begged for and were told how it was full of nothing but junk so she would not spend money on it. For me it was Apple Jacks. Christmas was the one time of the year I got Apple Jacks and I looked forward to it every year.

Finally we would have a very large Hershey chocolate bar. Last year I thought this would be a big hit with my boys but they only cared about the cereal. The candy bar lasted until December 27th in our house, but as a child, it was the first thing I took a bite of. Candy for breakfast was such a strange thing, it enhanced the magic and the special feeling for the day.


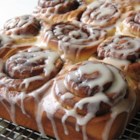
Both my moms also made a large breakfast. We would have our cereal, chocolate and orange for snacks to last us to the 2 pm lunch/diner we would have at our grandparents home. Pancakes, bacon, eggs, hashbrowns could all be found at the breakfast table. One thing my biological mom would always make the night before was cinnamon rolls. Like the other things mentioned, this would only happen one time a year, making it so special. I don't have her recipe to share but I make a pretty good one every year for my family. Please enjoy for a special holiday (or a Sunday). I hope you find the magic in this holiday and create some traditions to enhance the magic for your little ones and young at heart.

Clone of a Cinnabon
recipe image
Rated: rating
Submitted By: Marsha Fernandez
Photo By: abrooks
Prep Time: 20 Minutes
Cook Time: 15 Minutes
Ready In: 3 Hours
Servings: 12
"Save yourself a lot of money by making your own homemade cinnamon rolls! The dough is made in the bread machine and everything else is done by hand."
Ingredients:
1 cup warm milk (110 degrees F/45
degrees C)
2 eggs, room temperature
1/3 cup margarine, melted
4 1/2 cups bread flour
1 teaspoon salt
1/2 cup white sugar
2 1/2 teaspoons bread machine yeast
1 cup brown sugar, packed
2 1/2 tablespoons ground cinnamon
1/3 cup butter, softened
1 (3 ounce) package cream cheese,
softened
1/4 cup butter, softened
1 1/2 cups confectioners' sugar
1/2 teaspoon vanilla extract
1/8 teaspoon salt
Directions:
1. Place ingredients in the pan of the bread machine in the order recommended by the manufacturer. Select dough cycle; press Start.
2. After the dough has doubled in size turn it out onto a lightly floured surface, cover and let rest for 10 minutes. In a small bowl, combine brown sugar and cinnamon.
3. Roll dough into a 16x21 inch rectangle. Spread dough with 1/3 cup butter and sprinkle evenly with sugar/cinnamon mixture. Roll up dough and cut into 12 rolls. Place rolls in a lightly greased 9x13 inch baking pan. Cover and let rise until nearly doubled, about 30 minutes. Meanwhile, preheat oven to 400 degrees F (200 degrees C).
4. Bake rolls in preheated oven until golden brown, about 15 minutes. While rolls are baking, beat together cream cheese, 1/4 cup butter, confectioners' sugar, vanilla extract and salt. Spread frosting on warm rolls before serving.

Monday, December 17, 2012

Cookie (recipe) Exchange

Have you made your Christmas cookies yet? It has been a holiday tradition in our house to bake sugar cookies the Saturday before Christmas to take to friends and neighbors. I always remember being in the kitchen either adding the flour, rolling out the dough or adding way to many sprinkles to the gobs of frosting Mom allowed us to dump on one cookie. There were no real rules when it came to the decorating, just don't lick your fingers on the ones you are giving away.

My boys are also in the kitchen with me just as I was with Mom and Grandma. Same rules apply. Wash your hands, stay clear of the stove, put whatever sprinkles you want on the cookies and don't lick your fingers. We have also added the singing Christmas songs as loud as you can to our list of rules to make this as fun as possible.

I have asked some of the Great Lakes Bay Moms to share some of their favorite cookie recipes. Enjoy this time creating a mess and enjoying your children.

Jill Pfeiffer

My Grandma spent hours baking for her family during the Christmas holidays. I remember helping her bake gingerbread men, popcorn balls and her molasses cookies. I was never able to get a copy of that recipe but this recipe is the closest I could fine. Every time I bake these cookies and than bite into their chewy delightfulness, it sends my memory back to my Grandma’s kitchen with all those gingerbread men spread across her table. My Grandma died five weeks after my daughter was born but her memory is always close by, especially during Christmas.
Molasses Cookies
3/4 C butter
1 C white sugar
1/4 C molasses
1 egg
2 C flour
2 tsp soda
1/2 tsp cloves
1 tsp ginger
1 tsp cinnamon
1/2 tsp salt
1/2 C coarse sugar
Beat the first 4 ingredients in a bowl. Add the remaining ingredients except the coarse sugar. Form into balls and dip into the coarse sugar. Bake in a 375 degree oven for 7 to 8 minutes. Cool. Yields 3 dozen.

Hillary Swemba-Hagemeyer

This cookie takes me back to the days when I was a little girl, a few days before Christmas. You know the ones - right after you got out of school for Christmas break and right before Christmas? Those days were ALWAYS the longest, and still are. During that time, I would stay at my Grandma’s house. She would keep me busy with many games of dominoes, coloring, watching Christmas movies, playing with my dolls, baking and sharing lots of memories together over hot cocoa. She would tell me that if we drank enough hot cocoa, it would snow and we would have a “white Christmas”! So needless to say, we drank A LOT of hot cocoa! She too shared a LOVE of hot chocolate! I now tell my boys the same thing. I discovered this recipe a couple years ago and it has become a family favorite. Every time I make it, I think of my Grandma and the special memories that we have shared. I love you Gram, I’m so blessed to have you as MY grandmother!


Hot Cocoa Cookies
1 1/4 cup room temperature unsalted butter
1 cup white sugar
2/3 cup brown sugar
2 eggs
1 tsp vanilla
3 1/4 cups flour
4 packages of instant cocoa
1 1/4 tsp baking soda
1 tsp baking powder
1 cup milk chocolate chips
1 cup mallow bits
1. Preheat oven to 350 degrees.
2. Cream butter and sugar until light and fluffy.
3. Add in eggs and vanilla and stir until combined
4. In a separate bowl, whisk together flour, hot cocoa mix, baking soda and baking powder.
5. Add in flour mixture to butter mixture until well combined.
6. Fold in mallow bits and chocolate chips.
7. Drop by 1 1/2 tablespoon rounds onto parchment lined baking sheet.
8. Bake for 9 – 11 minutes until edges are lightly browned.
9. Remove to wire racks and cool.


Lisa Brown

Sugar Cookie Cutouts

1 1/2 cups butter, softened
2 cups white sugar
4 eggs
1 teaspoon vanilla extract
5 cups all-purpose flour
2 teaspoons baking powder
1 teaspoon salt


In a large bowl, cream together butter and sugar until smooth. Beat in eggs and vanilla. Stir in the flour, baking powder, and salt. Cover, and chill dough for at least one hour (or overnight).

Preheat oven to 400 degrees F (200 degrees C). Roll out dough on floured surface 1/4 to 1/2 inch thick. Cut into shapes with any cookie cutter. Place cookies 1 inch apart on ungreased cookie sheets.

Bake 6 to 8 minutes in preheated oven. Cool completely.         


Tuesday, December 4, 2012

A New Spin On A Holiday Classic

One thing I love about Christmas are the cookies my mom decorates just so. They are almost too cute to eat, but I do, in excess. I have tried very hard to make them just like her but I am pretty sure she left out some magical ingredient when she wrote down the recipe for me many years ago.
Instead of trying to make the adorable cookies like Mom, I have started making cupcakes. If you want to bring something a bit different to your next holiday party why not give one of these cookie inspired cupcakes a try.


Sugar Cookie Cupcakes
recipe by Baked Perfection

1 cup butter, softened
2 cups sugar
3 eggs
2 teaspoon vanilla extract
3 cups all-purpose flour
1 teaspoon baking soda
1/2 teaspoon baking powder
1/2 teaspoon salt
2 cups sour cream

In a medium bowl combine the flour, baking soda, baking powder, and salt. In a separate mixing bowl, cream the butter and sugar. Beat in the eggs, one at a time. Add the vanilla; mix well. Add the flour mixture to creamed mixture alternately with sour cream (batter will be thick). Fill greased or paper-lined muffin cups with 1/4 cup of batter. Bake at 350 degrees F for 18 minutes. Recipe makes approximately 30 cupcakes.

Very Vanilla Frosting (for both sugar cookie cupcakes and gingerbread cupcakes)
recipe by Baked Perfection

2 sticks of butter, softened
6 cups powdered sugar
pinch of salt
3 tablespoons vanilla extract
2 -4 tablespoons milk

Beat butter and vanilla until creamy. Add salt. Add powdered sugar 1 cup at a time, beating until combined. Add milk 1 tablespoon at a time until you reach desired consistency.
 Gingerbread Cupcakes
2 1/2 cups all-purpose flour
2 tsp. ground ginger
2 tsp. cinnamon
1/4 tsp. allspice
1/4 tsp. salt
1/4 cup butter, softened
1/4 cup canola oil
1 cup sugar
1/2 cup dark molasses (not blackstrap)
2 large eggs
2 tsp. baking soda
Preheat the oven to 350°F.
In a small bowl, stir together the flour, ginger, cinnamon, allspice and salt. In a large bowl beat together the butter, oil, and sugar until pale yellow and fluffy. Beat in the molasses and eggs until smooth. Put the baking soda into a small bowl or liquid (you’ll need extra room – it bubbles up) measuring cup, and add 3/4 cup boiling water.
Add a third of the dry ingredients to the butter-sugar mixture, beating on low speed just until blended. Add half the water mixture in the same way, then another third of the dry ingredients, the rest of the water mixture and the rest of the dry ingredients, blending just until combined. Fill paper-lined muffin tins 3/4 full and bake for 18 minutes, or until tops are springy to the touch. Makes 1 1/2 dozen cupcakes.

Photo Credit
 Chocolate Chip Cookie Dough Cupcakes
Recipe adapted from Annie’s Eats

Cupcake:
1 ½ cups unsalted butter, softened
1 ½ cups light brown sugar, firmly packed
4 eggs
2 2/3 cups all purpose flour
1 tsp baking powder
1 tsp baking soda
Pinch of salt
1 cup whole milk
2 tsp vanilla extract
1 cup chocolate chips (I used milk chocolate)

Preheat the oven to 350 degrees. Line 2 muffin pans with liners. Combine the butter and sugar in mixing bowl, beat on medium-high speed until light and fluffy, about 3 minutes. Add the eggs one at a time, beating after each addition. Scrape the sides of the bowl with a rubber spatula as needed.

In a separate bowl, combine the flour, baking powder, baking soda, and salt. Stir together vanilla and milk in a measuring cup. Add 1/3 of the flour mixture to the batter, mix at low speed. Alternate adding flour mixture in 3 parts with ½ of the milk; beginning and ending with the flour mixture. Mix each addition until just incorporated. Fold in the chocolate chips. Scoop the batter evenly into prepared cupcake liners, filling each about 2/3 to ¾ of the way full. Bake about 18 minutes, until a toothpick inserted in the center comes out clean. Cool in the pan about 5 minutes and then transfer to a wire rack to cool completely before frosting.

Frosting:
1 ½ cups unsalted butter, softened
¾ cup light brown sugar, firmly packed
3 ½ cups powdered sugar
1 cup all purpose flour
½ tsp salt
3 T whole milk
2 ½ tsp vanilla extract
Extra chocolate chips for decoration if desired

Beat the butter and brown sugar until light and fluffy, about 3 minutes. Mix in the powdered sugar, mixing on low speed, until smooth. Add in the flour and salt and beat on low speed until incorporated. Add the milk and vanilla and beat until smooth.

Transfer the frosting to a piping bag fitted with a large star tip and pipe frosting on to cooled cupcakes as desired. Sprinkle chocolate chips on top if desired.