Monday, February 25, 2013

The Easiest (and cheepest) Microwave Popcorn

In the information world we live in, I sometimes assume what I know everyone else knows. I sometimes don't share my tips and tricks that I find every so handy because I am sure you have already heard it. That is the case with making your own microwave popcorn. We are big popcorn people but I could never eat the standard microwave kind. Something about the taste was too much for me. When I was a kid my parents had an air popper and I liked the plain taste of this grain. I did not want to have a bunch of uni-taskers (appliances that only did one thing) so I just felt I could never have popcorn unless I wanted the rich, chemical filled kind that was set for the microwave OR try my hand at it on the stove.

I am not one for the stove with certain things. I have no idea why but I can't make popcorn, caramel or pancakes on the stove. Well I can if you like them a bit blacken. I have worked YEARS in camp kitchens, restaurant kitchens and of course my own but have never mastered the skill of making those items. Maybe it is a patience thing.

Anywho....A few years ago I found how to make popcorn using a simple paper bag. That's right, the only thing that stood in my way of the awesome movie experience was a lunch sack. I have been making it this way ever since. It is more than a movie going treat too. We use it in place of the sandwich in our kids lunches for a great source of grain. It is a very filling low calorie treat as well. You can add a dusting of cinnamon and sugar for a sweet craving or some garlic salt in place of those potato chips.

If you are asking how? Let me show you.

First, get a paper lunch sack and a bag of unpopped popcorn (costs about 1.20 per bag)
 Then get 1/4 a cup of the popcorn and dump in the bag.


Seal up the bag so there is still room for the popcorn to pop up but the top of the bag isn't touching the top of the microwave. Pop for about 2 minutes. If the bag falls over, take it out and you are done. Once it is on it's side it will start to overcook the popcorn and it will burn.


Enjoy!
 
As I said before I like it plain but most people don't. You can melt butter and pour over the top and then add seasonings OR you can use olive or sunflower oil to get some of that healthy fats into your diet. I have mine in a spray bottle with 1 part oil and 3 parts water but I have seen Pampered Chef and Weight Watchers ones that you just add the oil and the work is done for you.

Monday, February 4, 2013

Love, Pizza and Cookies

This past weekend we had a family date and made some pizza. The chefs were ready at the counter to start making their pie and of course make a mess. We used a pre-made crust I found at the grocery store but we have also made our store own crust using this recipe. Gathering up our sauce, cheese and Italian seasoning we were ready to go. The boys don't like topping so we made a cheese pizza, but if you want you can add any toppings you like. Then we set up an assembly line to make sure every one got a turn. 


Chef Jack added the sauce with some help from Daddy.


                                                  Chef Archer adds the cheese.
Chef Hudson does a little shake shake shake to add the seasoning.


      With a few cut up strawberries and a bread stick, Chef Archer enjoys his handy work.


We also made cookies. Oatmeal raisin cookies are not a big hit in our house because my husband does not like raisins, he will eat dried cranberries though. With Valentines Day coming up; the splash of red is a great holiday inspired treat without too much work. Of course making anything into a heart is fun, you can even make a heart pizza if you make your own dough, I wanted to do something that 3 toddlers could all do at one time. With one heart cookie cutter we were sure to have some fights.

                                                         Oatmeal Cranberry Cookies
 makes 2 dozen cookies


1 cup butter, softened
1 cup white sugar
1 cup packed brown sugar
2 eggs
1 teaspoon vanilla extract
2 cups all-purpose flour
1 teaspoon baking soda
1 teaspoon salt
1 1/2 teaspoons ground cinnamon
3 cups quick cooking oats
1 cup dried cranberries
Directions:
1. In a medium bowl, cream together butter, white sugar, and brown sugar. Beat in eggs one at a time, then stir in vanilla. Combine flour, baking soda, salt, and cinnamon; stir into the creamed mixture. Mix in oats. Cover, and chill dough for at least one hour.
2. Preheat the oven to 375 degrees F (190 degrees C). Grease cookie sheets. Roll the dough into walnut sized balls, and place 2 inches apart on cookie sheets. Flatten each cookie with a large fork dipped in sugar.
3. Bake for 8 to 10 minutes in preheated oven. Allow cookies to cool on baking sheet for 5 minutes before transferring to a wire rack to cool completely.

Wednesday, January 23, 2013

Extract!!! Extract!!! read all about it

Do you find yourself reaching for the imitation vanilla extract over the pure vanilla extract at the grocery store? I really can't blame you because the price difference is insane!! Plus really, can the difference in taste be all that different? Well no, the taste may not be all that different but the imitation stuff is just that .....fake. Synthetic chemicals made in a lab by scientists doesn't sound too appealing to me so I try to buy the real stuff when I can, but that can put a big dent in my pocket book when it comes to baking.

Did you know that making your own extracts only takes a bit of time, alcohol and the flavor of your choice? Here are a few recipes on different extracts. If you make them now (or before August), with a bit of cute packaging, you can have some homemade Christmas gifts already done for the baker in your family.

Recipes adapted from Spoonforkbacon.com

(Some) Homemade Extracts
Makes 1 cup each extract
Ingredients:
cinnamon extract:
1 cup brandy
4 cinnamon sticks
vanilla extract:
1 cup brandy (or vodka)
3 vanilla beans, split with the “caviar” scraped out. I ordered this online for the best deal.
orange extract:
1 cup vodka
peel of 5 oranges, ALL pith removed
lemon extract:
1 cup vodka
peel of 5 lemons, ALL pith removed
mint extract:
1 cup vodka
1 cup of mint leaves, crushed

1. For each extract ,sterilize a 16 ounce jar and fill with the cinnamon sticks, vanilla beans or citrus peels.
2. Pour assigned liquor over each jar and tightly seal. Gently shake each jar and set aside in a dark, cool area.
3. Allow mixtures to infuse for at least 2 weeks before, straining and bottling for use. I like mine to sit for at least 4 months to ensure good flavor extraction.
**Gently shake each mixture up every couple of days.

Here is my favorite part.....Once made you can have extracts for years. When you use a bit of the extract, I wait until it is 1/2 gone, add some more liquor and shake. That's it, no more base ingredient needed.

Now these are just some extracts you can make that I know work. If you are feeling a bit daring, try some others like coffee, almond or lime.

If you are worried about the alcohol content, please note that when baking or cooking the "getting you drunk" part is evaporated in the cooking process and you are only left with the flavor. 

Monday, January 14, 2013

Can you be a fruit and veggie ninja?

It can be a challenge to get your kids (or yourself and spouse) to eat the recommended 5 servings of veggies and fruits a day. In our house it has to be done in a somewhat sneaky manner. With a blender or food processor you can make delicious meals that are also nutritious and no one has to know, unless you feel like letting them in on the secret.

I don't always have time to steam or roast veggies, puree and then add to the meal. In order to make sure I have purees on hand; I set aside a day every few months and will make 1 cup blend packs to have in the freezer. Picking up in season fruits and veggies either at the grocery store, farmers market, u-pick farms or my own garden, I then steam or roast the items, blend and place one cup in a labeled freezer bag. I lay them flat in my freezer in groups so they can be found quickly when I need them. I try to get them out the night before to thaw but I can also defrost in the microwave if I forget. 

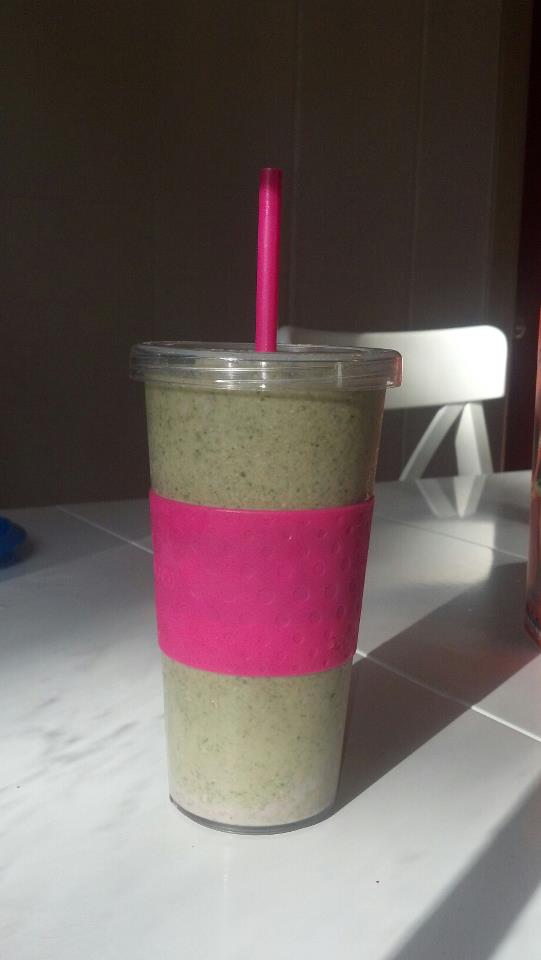
Our easiest way to get a full serving of spinach and fruit is to make a smoothie. We call it the green monster to make it more fun for the boys. My highest recommendation comes from my father who will tell you he HATES vegetables. I gave him a small test of this recipe one day and he had no idea spinach was in it (even though it was completely green). You can add some things like flax, chia seeds and wheat germ to make it even more healthy and no one will know. 

Green Monster Smoothie
1 cup of frozen fruit - I like strawberries but pineapple, bananas, blueberries all work well
1 cup of milk - Soy, Almond, Coconut, Cow all work
3 cups of spinach
Blend smooth and enjoy.

You can also add :
1 TBSP Flax Seed
1 TBSP Wheat Germ
1 TBSP Chia Seeds
Protein Powder
A bit of honey for sweetness 


For some more recipes to try, click on the following links:
carrot cookies
pepper pizza
Sweet Peas Au Gratin
Mac and Cheese (winter squash) 
Carrot Roll Ups 
Baked Zucchini Fries 
Whoopie Pies (Beets) 
Pancakes (sweet potato) 
Sloppy Joe (So many veggies!) 
Homemade Chicken Nuggets (any veggie you like) 

These are great "get you started" recipes but don't be afraid to experiment. Try matching colors (butternut squash and mac and cheese are the same shade of orange), beets and carrots are sweet and go great with dessert, squash can go sweet or savory replacing liquids in many recipes and so much more. Go ahead and be a bit of a ninja in the kitchen, it can be our little secret.


Saturday, January 5, 2013

Celebrating 3,2 and 32 (with some cupcakes)

On my 29th birthday I spent it in the hospital, reciting my information to every doctor and nurse who came in to talk to me. I then had to explain that yes my birthday was indeed THAT day and yes my 2nd son, Archer, would also have that birthday. 

Just before my 30th birthday I had to spend the weeks leading up to January explaining to the doctors and nurses that yes my birthday is January 8th, yes I had a child on January 8th and yes my 3rd son was DUE on January 8th. Little Hudson (well at 9 lbs and 6oz he wasn't that little) was actually born 5 days sooner so he could have his own day but he still celebrates on the 8th.

Over the past few years I have started making cupcakes for parties and other events around town. I have made everything from Mountain Dew cupcakes to a simple chocolate cupcake with great success. Recently a request for black forest cupcakes was made at my husbands work. I honestly had no idea what a black forest cake was and set forth on Pintrest to do some research. I found out that it is basically chocolate cake with some sort of cherry mixture on it. Easy enough to make into cupcake form. I did ask for a poll to be taken about the frosting because I found everything from chocolate frosting to whipped cream frostings to be used. The consensus was to use a chocolate frosting.

I hope you enjoy this cupcake recipe.I sent 18 into work, only keeping 5 for our family. That way I was not tempted to eat more than a serving. These were gone in record time and I am sure will be asked to send more in very soon.


Black Forest Cupcake
Makes around 23 cupcakes 
Ingredients 
  • 1 2/3 C all-purpose flour
  • 2/3 C unsweetened cocoa powder
  • 1 1/2 t baking soda
  • 1 t salt
  • 1/2 C unsalted butter
  • 1 1/2 C white sugar
  • 2 eggs
  • 1 t vanilla extract
  • 1 1/2 C buttermilk
  • Cherry pie filling (AFTER cupcakes are made)
Directions for cakes:

Sift together flour, cocoa powder, baking soda and salt. Set aside.
Cream butter and sugar until light and fluffy.
Beat in eggs and extracts.
Beat in flour mixture, alternating with buttermilk, until combined.
Fill cupcake liners 3/4 full.
Bake at 350 F for eighteen minutes or until cupcakes bounce back when touched.

After letting the cupcakes cool, I punched down the middle with a little tool I have for cupcakes. You can use a paring knife to cut a hole out of the top of each cupcake. Fill each hole with 3-4 cherries and some pie gel. 


Chocolate Frosting

Ingredients 

  • 1/2 C unsalted butter, at room temperature
  • 2 T sweeten condense milk
  • 6 T unsweetened cocoa powder 
  • 2 C powder sugar
  • Dash of milk (for creamy texture)
Directions

Blend butter, cocoa powder and powder sugar in a blender. Slowly add the condensed milk. Once mixed, blend for 1 min. If too thick, add milk to get right texture. *note: I prefer my frosting to be more like a thin fudge. 

You can pipe it on around the cherries or spread over the whole top. It all depends on your love of chocolate. 

ENJOY!!!


Sunday, December 30, 2012

Reducing Recipe Paper Clutter

The new year is here and those resolutions are back. Eat better, get organized, save money...... Every year we hope for the same thing and every January 2nd we are back to where we were December 31st.

I have decided to look at 2013 and set up mini goals for each month. One thing I wanted to focus on was getting my paper clutter under control. I don't like using my smart phone, computer or other electronic device to read my recipes so I have many printed out and stashed away. I also have recipes given to me by friends and family, from magazines or ones I have handwritten as I was testing out ideas. I had these papers stashed in a drawer but I was unable to access them when I wanted to recreate a dish.

I spent one evening and created a few cookbooks to house the pages I have collected over the years. With a few office supplies I was able to make a few personal cookbooks and clear a drawer of a large stack of paperwork.

I purchased:
1) 3 ring binder . Size 1 1/2 inch
3) 3 ring binder. Size 1/2 inch
A pack of page protectors.
A variety of scrapbook papers
A roll of packing tape

Separating the recipes into piles, I soon found the categories I wanted for my books. I found the following categories:  
Main Meals (Pork, Beef, Poultry, Meatless)
Sweet Treats (Cupcakes, Frostings, Cookies, Pies)
Breads and Sides
Breakfasts and Snacks


I took some pretty paper and slipped it in the front, back and side of the binder and created labels on the computer. I then took some packing tape and made some dividing labels for the top of the sections. I placed them on top because they stuck out to far if they were on the side. I used a page protector sheet, put some scrapbook paper in the page and placed a tab on top with the packing tape and a label made on the computer.


Between each section, I slid the recipes I have printed out, wrote out or ripped out of a magazine into page protectors. This will keep them safe from spills but will also allow me to write Weight Watcher point values, change things to make the recipe fit our family better or anything else I need to write on the page.


For recipes I have not filed yet because I am not sure if they will work or I haven't had the time, I place them in the front pocket of the corresponding  book.

Having my own books have made meal times so quick and easy. They are all recipes we enjoy and almost all of the ones I add can be freezer ready. I no longer have to dig through a drawer of papers to find that one recipe Mom said I should try. This was a project that was well worth the 2 hours spent collecting, sorting and decorating the books.


How do you have your recipe collection stored?

Wednesday, December 19, 2012

Christmas Traditions

Traditions have always held special meaning to me. As a child they offered me a sense of normalcy and as an adult they helped me remember the magic that is Christmas. My parents divorced when I was 2, which meant for me I spent Christmas with one parent one year and the other parent the next year. I was very lucky that both my mom and step mom made sure I had the same traditions in each household. The things we did were not anything too difficult but I always looked forward to them. I am now sharing those things with my boys and remembering all the excitement of Christmas all over again.

We start with the sugar cookies the Saturday before Christmas. We deliver them to friends, family and of course leave some for the big man himself. We also leave out some carrot sticks for the reindeer. The next morning the boys will see the bites taken out of the treats and their stockings full of goodies.

In each stocking a few things will always be there. In the toe a large orange is added. This is a very old family tradition that many families do every year. The stories about the orange and the Christmas stocking are traced back to quite a few different origins but I always liked the story that talks about a very rich man who liked to help the poor in what is now known as Turkey. His name was Nicholas and he later became a bishop in the church.

Bishop Nicholas learned of a poor man with three daughters who had no dowries. And, without dowries, they could not marry. Bishop Nicholas took it upon himself to take three bags of gold coins and toss them down the poor man's chimney.....which somehow happened to land in the daughter's stocking that were hanging up to dry in front of the fireplace. The bags of gold turned into balls of gold which now symbolize the oranges. Bishop Nicholas is often shown in pictures wearing a red ceremonial robe and miter, while holding the staff of a bishop as well as holding three gold balls, gold coins, or pieces of fruit. He was later canonized and made a saint. Thus we know him as Saint Nicholas.

Next in our stocking we have a small box of our favorite cereal. It is the one that when shopping with Mom we begged for and were told how it was full of nothing but junk so she would not spend money on it. For me it was Apple Jacks. Christmas was the one time of the year I got Apple Jacks and I looked forward to it every year.

Finally we would have a very large Hershey chocolate bar. Last year I thought this would be a big hit with my boys but they only cared about the cereal. The candy bar lasted until December 27th in our house, but as a child, it was the first thing I took a bite of. Candy for breakfast was such a strange thing, it enhanced the magic and the special feeling for the day.


Both my moms also made a large breakfast. We would have our cereal, chocolate and orange for snacks to last us to the 2 pm lunch/diner we would have at our grandparents home. Pancakes, bacon, eggs, hashbrowns could all be found at the breakfast table. One thing my biological mom would always make the night before was cinnamon rolls. Like the other things mentioned, this would only happen one time a year, making it so special. I don't have her recipe to share but I make a pretty good one every year for my family. Please enjoy for a special holiday (or a Sunday). I hope you find the magic in this holiday and create some traditions to enhance the magic for your little ones and young at heart.

Clone of a Cinnabon
recipe image
Rated: rating
Submitted By: Marsha Fernandez
Photo By: abrooks
Prep Time: 20 Minutes
Cook Time: 15 Minutes
Ready In: 3 Hours
Servings: 12
"Save yourself a lot of money by making your own homemade cinnamon rolls! The dough is made in the bread machine and everything else is done by hand."
Ingredients:
1 cup warm milk (110 degrees F/45
degrees C)
2 eggs, room temperature
1/3 cup margarine, melted
4 1/2 cups bread flour
1 teaspoon salt
1/2 cup white sugar
2 1/2 teaspoons bread machine yeast
1 cup brown sugar, packed
2 1/2 tablespoons ground cinnamon
1/3 cup butter, softened
1 (3 ounce) package cream cheese,
softened
1/4 cup butter, softened
1 1/2 cups confectioners' sugar
1/2 teaspoon vanilla extract
1/8 teaspoon salt
Directions:
1. Place ingredients in the pan of the bread machine in the order recommended by the manufacturer. Select dough cycle; press Start.
2. After the dough has doubled in size turn it out onto a lightly floured surface, cover and let rest for 10 minutes. In a small bowl, combine brown sugar and cinnamon.
3. Roll dough into a 16x21 inch rectangle. Spread dough with 1/3 cup butter and sprinkle evenly with sugar/cinnamon mixture. Roll up dough and cut into 12 rolls. Place rolls in a lightly greased 9x13 inch baking pan. Cover and let rise until nearly doubled, about 30 minutes. Meanwhile, preheat oven to 400 degrees F (200 degrees C).
4. Bake rolls in preheated oven until golden brown, about 15 minutes. While rolls are baking, beat together cream cheese, 1/4 cup butter, confectioners' sugar, vanilla extract and salt. Spread frosting on warm rolls before serving.